

When firing a handgun, your grip is a major factor in controlling and recovering from muzzle rise and recoil. An improper, weak grip will allow the gun to flop around, making it difficult to re-acquire the sights for follow-up shots. If your grip is poor enough, it may even induce a stoppage such as a "stove-pipe" or a "short-stroke".
Bore Axis
Before we get into the nuts and bolts of a proper grip, let's talk about something called the "bore axis" and some basic physics. Wikipedia.org defines the bore axis as "the axis which goes through the center of the barrel" and goes on to say "In pistols the recoil from the fired cartridge (and the slide movement) will make the muzzle rise after each shot, and how high the bore axis sits in relationship to the hand will affect the degree of muzzle rise." So a high or low bore axis basically refers to how high or low above your hand the pistol's barrel rests. Some pistols inherently have higher bore axes than others. For instance, many double action pistols, such as the Beretta 92 or the Sig P226, have higher bore axes than striker-fired pistols like the Glock 17 or Smith and Wesson M&P9. When the shot breaks in a pistol, the muzzle will rise in the path of least resistance - up. A low bore axis may, to some degree, reduce muzzle rise, rendering the recoil more easily controlled.
You may be asking yourself what this has to do with your grip. Well, regardless of the mechanical bore axis of a firearm, you can further reduce or increase the bore axis by gripping the pistol high or low. A low grip makes your bore axis higher, increasing muzzle rise and allowing the pistol to flop around in your hand. Not a very efficient way to handle a pistol. On the other hand, a high grip will lower the bore axis, reducing muzzle rise and getting you back on target quickly.
Strong Hand Placement
As you learned in Marksmanship Fundamentals Part 1, "People have many different sized hands and pistols have many different sized grips. Grip your pistol in a such a way that you contact the trigger with the part of your index finger that allows you to most easily press the trigger straight to the rear." The NRA Guide to Basics of Pistol Shooting addresses this issue as well, "the proper grip for one firearm may not be appropriate for another firearm; your grip may vary depending upon the shape of a gun's grip frame."

 |
| Because the Glock 22 and Ruger LCP have differently sized and shaped grips, trigger finger placement and the angle at which you grip these pistols may be different. |
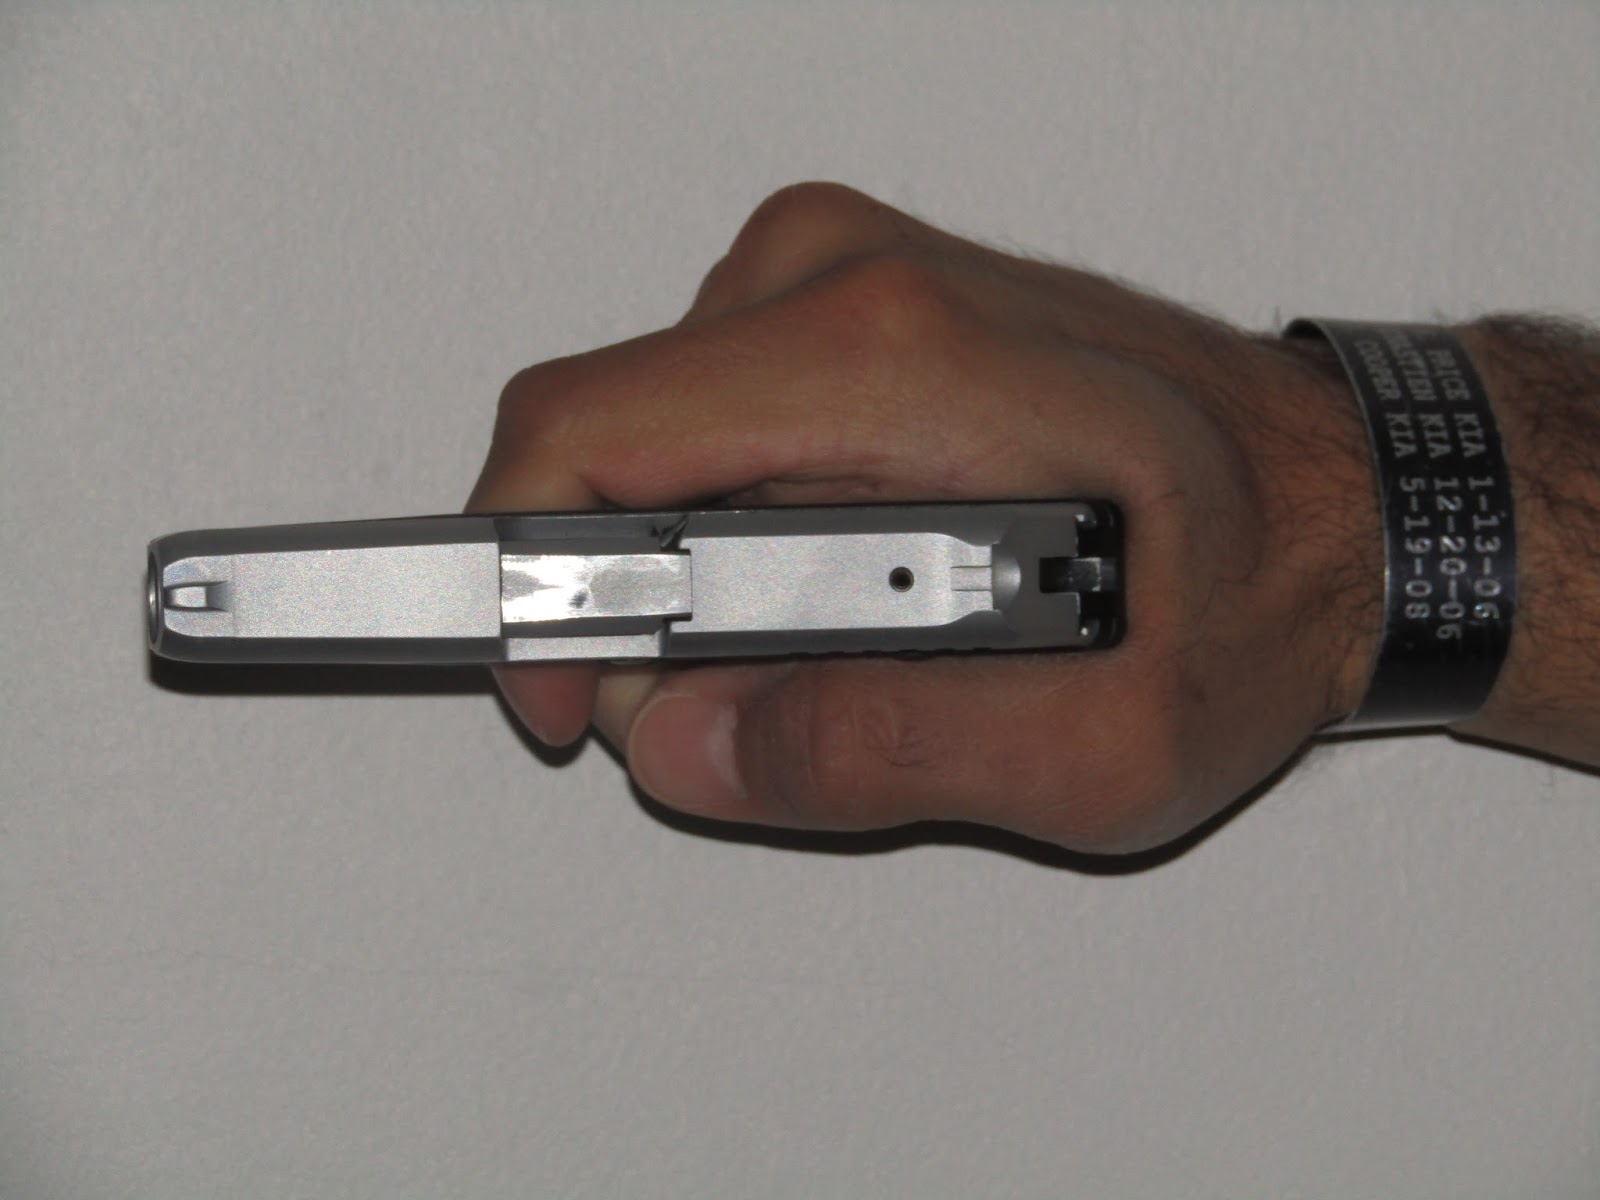
Once you've found the right angle for you to grip the pistol, make sure that your grip is sufficiently high. The web of your strong hand should be pressed firmly against the "beavertail" at the top of the grip's backstrap. Your strong hand middle finger should be firmly pressed against the bottom of the trigger guard. When putting pressure on the pistol's grip, squeeze firmly, but not to the point that you're "white-knuckling" it. The energy that it takes to squeeze that hard will cause you to fatigue quickly and become unsteady.
 |
| Proper strong hand placement: Note how high the hand is, particularly the web of the hand and middle finger. |
 |
| Improper strong hand placement: Note the visible gaps beneath the beavertail and triggerguard due to a low grip. |
Support Hand Placement
 |
| The support hand should fill in and maintain contact with the highlighted area of the frame and grip. |
 |
| Proper support hand grip: Thumbs stacked and pointed forward, contacting the frame. |
 |
| Proper support hand grip: Support fingers around strong hand fingers with index finger pressed firmly against the triggerguard. |
 |
| Improper support hand grip: Support thumb does not contact the frame. Grip is too low, leaving a gap beneath the triggerguard. |
 |
| A trick that may work for you is to pinch the bottom of the triggerguard with your support index finger. |
In closing, remember that your grip should be high to bring the bore axis closer to your hand and that you should maintain contact with as much of the frame as possible to increase traction and control. If executed properly, your high, firm grip should reduce excess movement during recoil and decrease your recovery time between shots. Now here's Travis Haley with an excellent demonstration of proper handgun grip. Stay safe and shoot often!